From Plastic to Rock: A 5-Step Guide to Your First Outdoor Climb
So, you’re crushing it at the wall. You can lead 6b, your finger strength is feeling good, and you’re the most reliable belay partner in your group. But when you think about climbing on a Dartmoor tor or a coastal sea cliff... it feels different. Intimidating, even. It’s the most common feeling for an indoor climber. You’re moving from a warm, controlled, and predictable environment to a wild, natural, and dynamic one. The good news? You already have the most important skills: movement, strength, and a basic understanding of safety. Making the leap to outdoor climbing isn’t as hard as you think. It’s just a new set of skills to add to your toolkit. As an RCDI (Rock Climbing Development Instructor), I specialise in helping people make this transition safely. Here is my 5-step guide to get you started

Step 1: Change Your Mindset (It’s Not a Gym)
There’s no staff member to shout for if you drop your belay device. You have to be able to solve your own problems.
At the wall, someone else is responsible for your safety. The bolts are tested, the holds are secure, the routes are brightly coloured, and there’s a crash mat below. Outdoors, you are 100% responsible. This is the biggest mental shift. You are now responsible for checking the rock, checking your gear, checking your partner, and making your own safety decisions. You also need to think about new factors:
The Environment: Is it about to rain? Is the tide coming in? Is that rock loose?
Ethics: You are a guest in nature. This means Leave No Trace, being quiet, and being respectful of others.
Self-Reliance: There’s no staff member to shout for if you drop your belay device. You have to be able to solve your own problems.

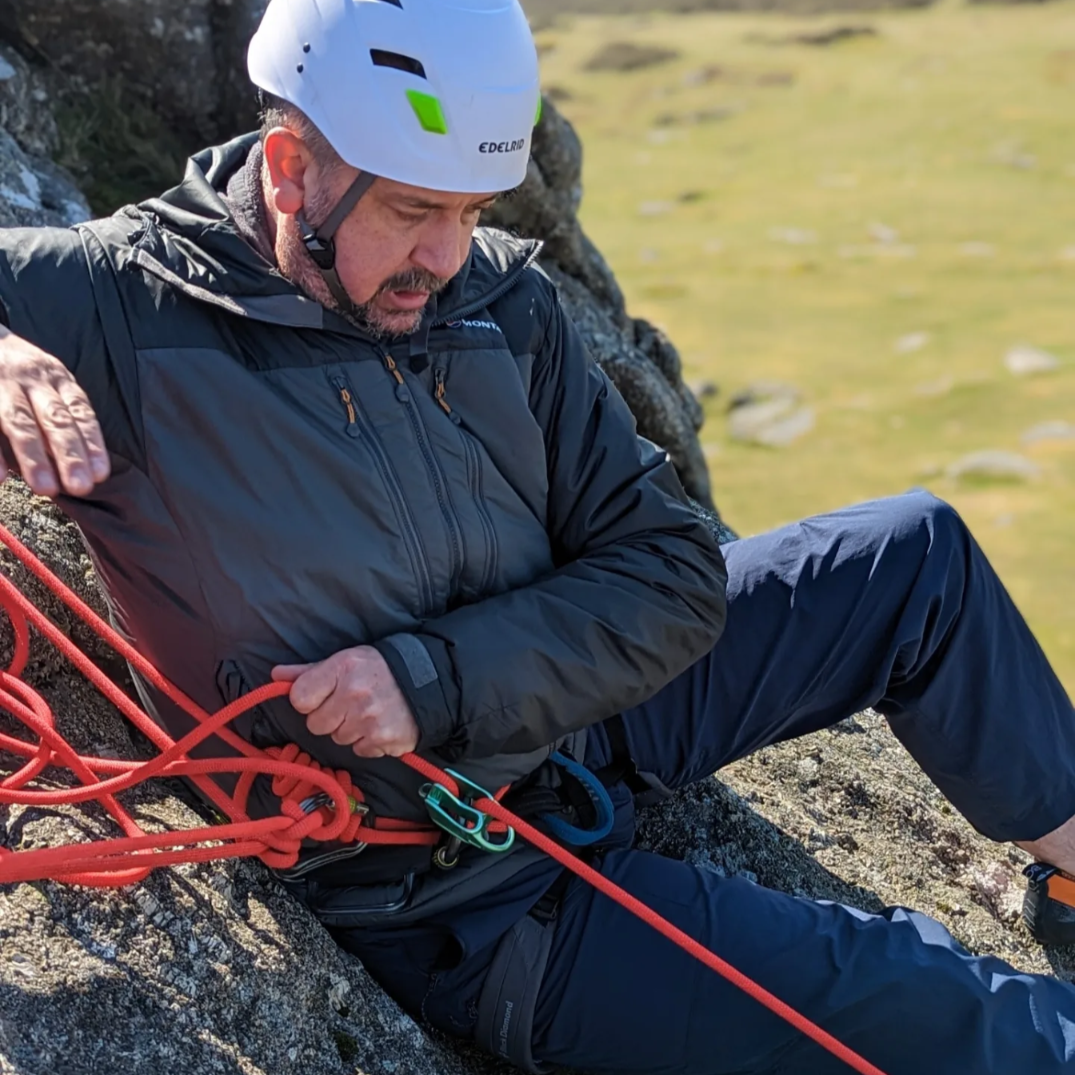
Step 2: Get the Right Gear (Yes, You Need a Helmet)
A full set of ”protection” (nuts, cams, and slings) is a big investment. Don’t buy this until you’ve been on a course to learn how to use it.
Your harness, shoes, and belay device are all perfect. But you’ll need a few new, non-negotiable items.
A Helmet: This is not optional. Indoors, nothing can fall on you from above. Outdoors, rocks can be dislodged, gear can be dropped, and you can swing into the wall if you fall. Wear a helmet.
A Rope: You’ll need your own rope. A 60m single rope is the perfect all-rounder to start with.
Quickdraws (for Sport): If you’re starting with sport climbing, you’ll need around 12-15 quickdraws.
A Trad Rack (for Trad): This is the big step up. A full set of ”protection” (nuts, cams, and slings) is a big investment. Don’t buy this until you’ve been on a course to learn how to use it.
A Guidebook: Not just an app. A physical guidebook is a vital tool that teaches you how to find the crag, identify your route, and understand the local dangers
Step 3: Master the ”Outdoor” Safety Systems
You won’t be standing on a flat, padded floor. You might be on a sloping, rocky ledge, or tucked out of the wind. Managing your rope and your position is a new skill.
This is the most critical step. How do you stay safe when there’s no perfect indoor setup?
Building Anchors: Indoors, you clip two perfect steel carabiners at the top. Outdoors, you have to build your own anchor (a ”belay”) to bring your partner up. This is the single most important skill you will learn, and it must be taught correctly.
Getting Down Safely: At the wall, you just shout ”Take!” and get lowered. At many outdoor crags, you will need to abseil to get down. This is a common place for accidents, and it’s a skill that requires proper, professional instruction.
Belaying on Uneven Ground: You won’t be standing on a flat, padded floor. You might be on a sloping, rocky ledge, or tucked out of the wind. Managing your rope and your position is a new skill.
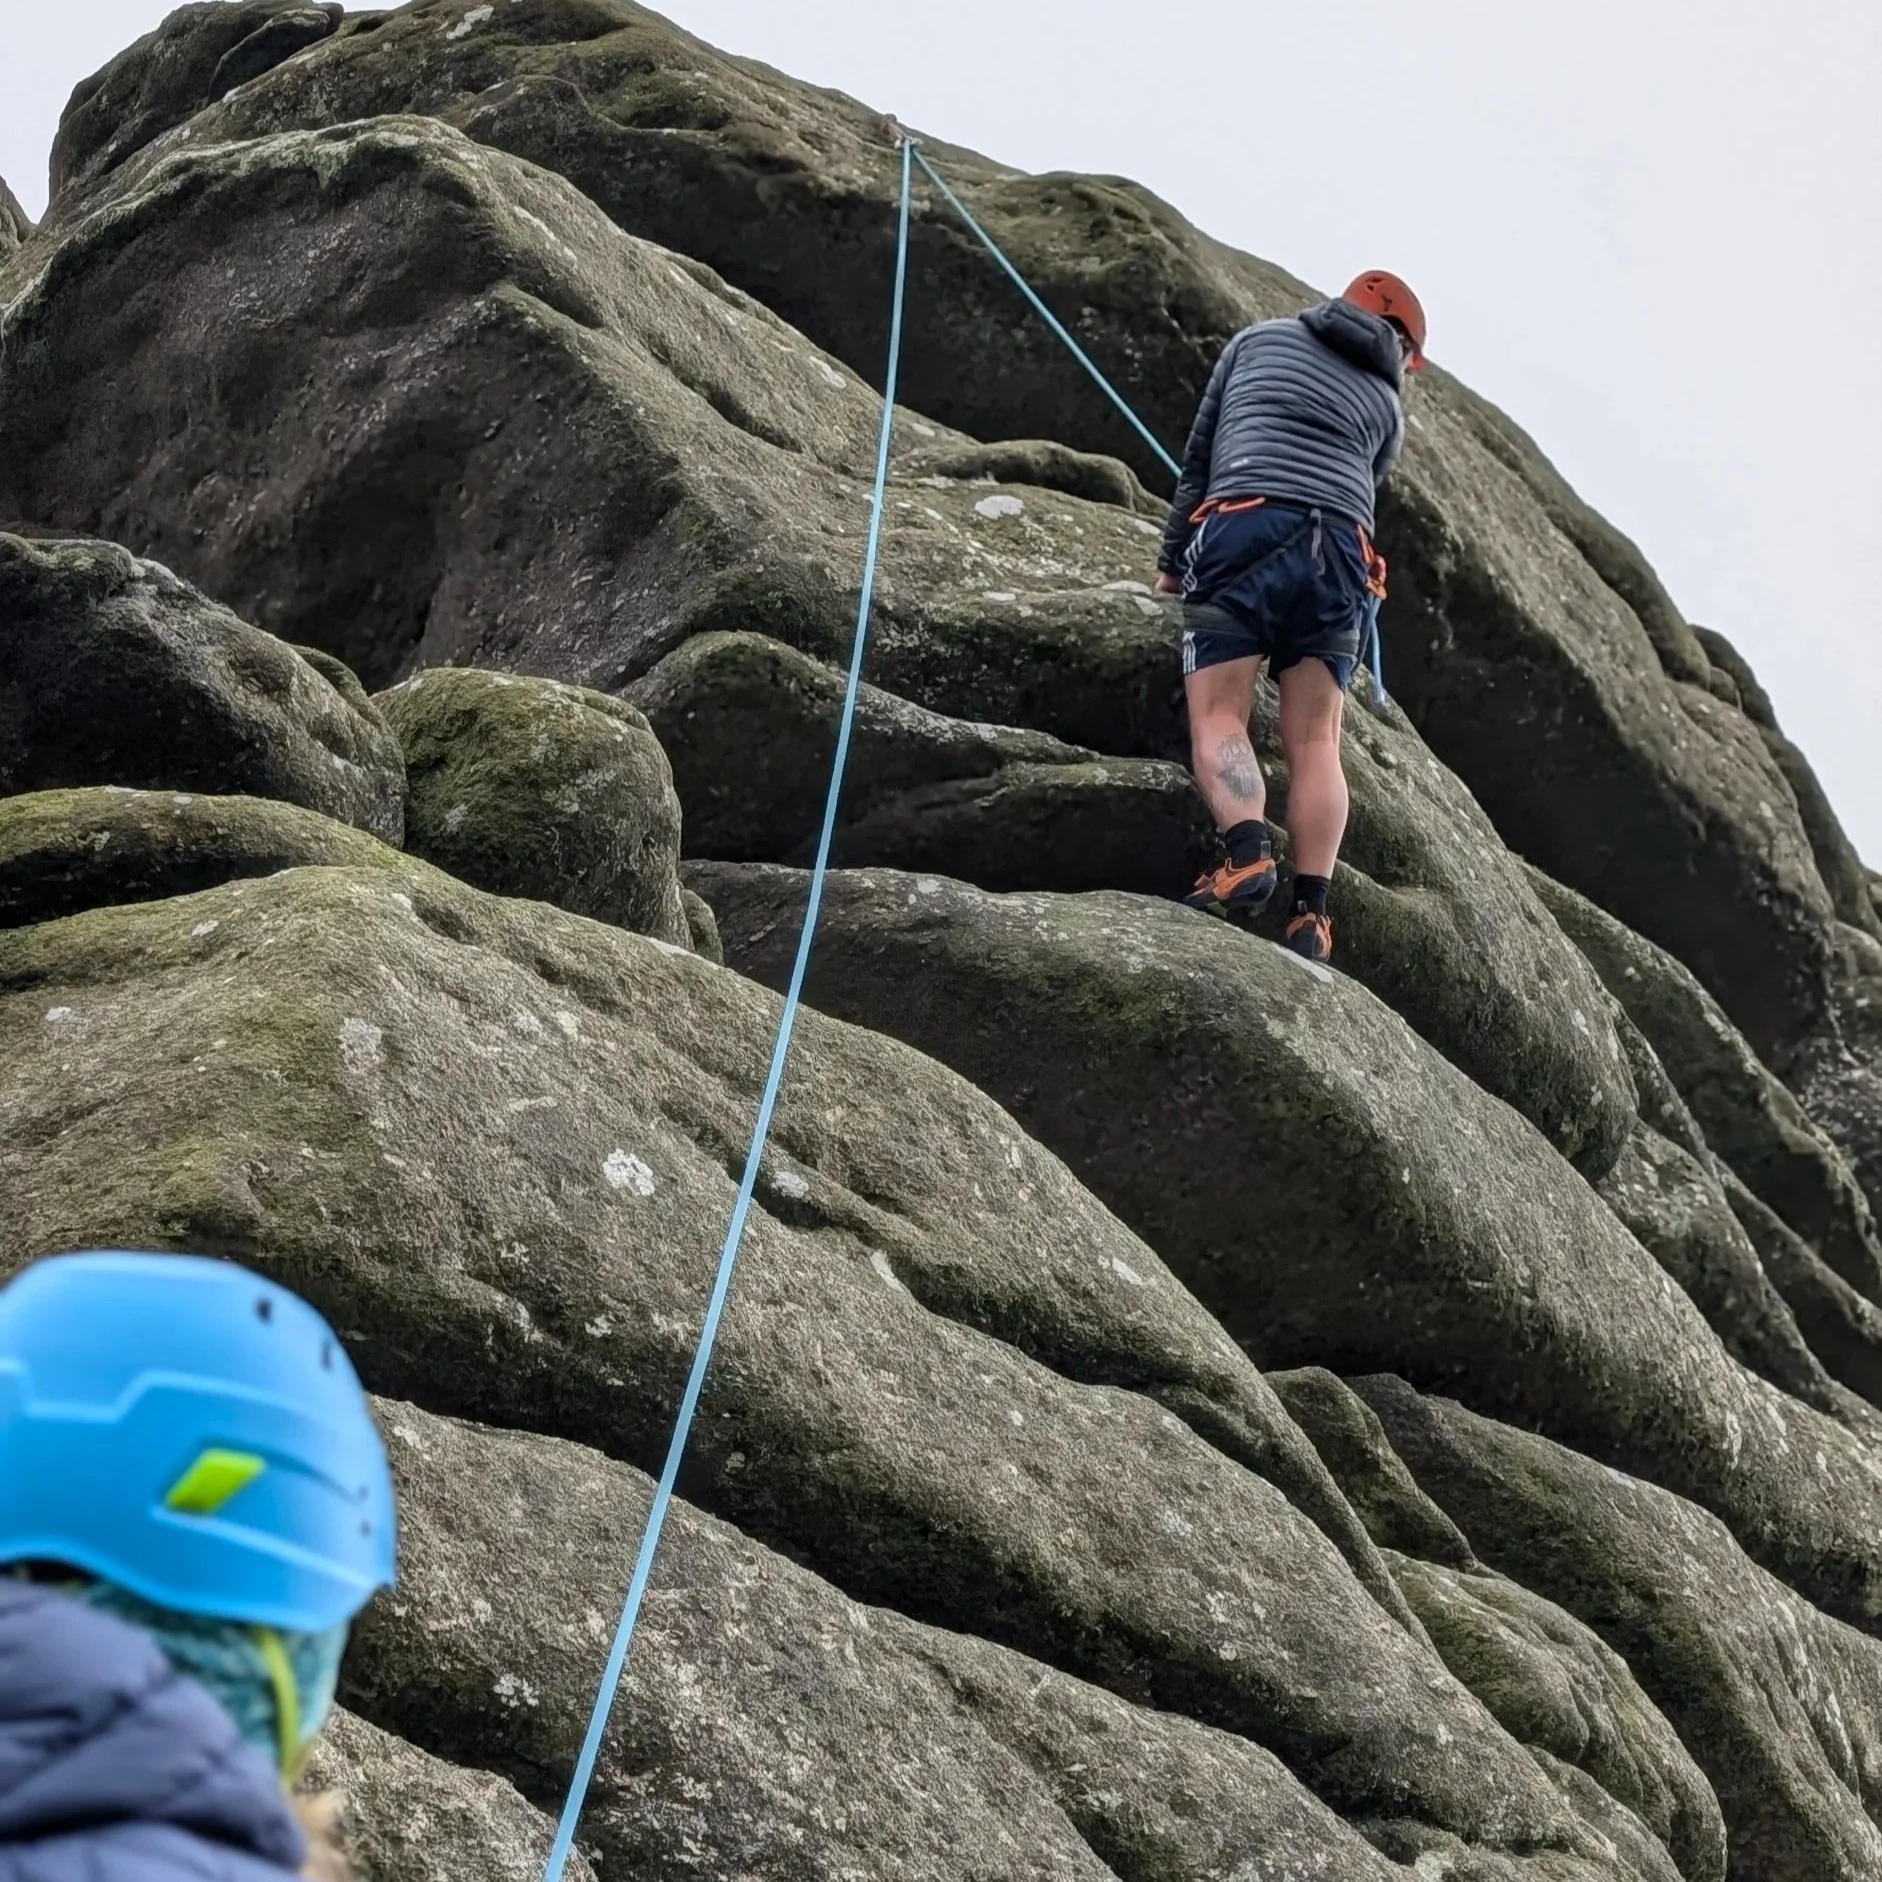
Step 4: Re-Learn How to Move
Because there are no bright blue holds to follow. You have to find the holds.
You can climb 6b on plastic, but a 5a on real rock might feel desperate. Why? Because there are no bright blue holds to follow. You have to find the holds. Your climbing will become slower, more thoughtful, and much more focused on footwork. You’ll learn the joys of ”smearing” (using the friction of your shoe on blank-looking rock), trusting tiny crystals, and solving a natural puzzle. It’s a different, and many would say more rewarding, style of movement.

Step 5: Your First Day Out (The Smart Way)
An instructor (like me!) will teach you the systems, let you practice in a safe environment, and give you the confidence to do it yourselves.
Don’t just grab your indoor partner and a new rope and ”give it a go.” This is a recipe for a scary (and potentially dangerous) day.
Option 1 (The Best): Go with a qualified instructor.
Shameless plug, but it’s the truth! This is the fastest, safest, and most effective way to learn. An instructor (like me!) will teach you the systems, let you practice in a safe environment, and give you the confidence to do it yourselves.
Our Intro to Outdoor Rock Climbing course is perfect if you just want to top-rope and get a feel for the rock.
Our Indoor-to-Outdoor Transition Workshop is the one for you if you already lead indoors and want to learn the specific anchor and safety skills
Option 2: Go with an experienced mentor.
Find a friend who is an experienced and patient outdoor climber. The key is that they are happy to spend the day teaching, not just climbing their own routes. Go to an easy, beginner-friendly crag. Start by toproping. Practice building anchors while standing on the ground. Leave your ego at home and be prepared to climb grades that feel ”easy.”
Making the leap from plastic to rock is the most rewarding journey in climbing. It opens up a whole new world of adventure, from the sea cliffs of Cornwall to the mountains of Wales. You’re closer than you think. If you want to start that journey, check out our outdoor climbing courses. We specialise in helping people make this exact transition.
Ready to Make the Leap?
Making the leap from plastic to rock is the most rewarding journey in climbing. You've already got the movement skills; now all you need is the "outdoor" knowledge.
The fastest and safest way to gain that confidence is with an expert.
If you're ready to get started, the best option is a Bespoke Private Guiding day. We can spend a full 1-to-1 day building your first anchors, placing gear, and climbing your first real routes, all at your own pace.
If you're not quite ready to book, that's fine too! Get a taste of what's out there by downloading my FREE guide to the "Top 5 Beginner-Friendly Climbs on Dartmoor" when you join the Climb Devon community